Antique Glassware Identification: Shape, Color, Seams, and Maker Clues
Compare antique glassware shape, color, seams, rims, bases, bubbles, wear, and maker clues before treating a photo match as final.
Quick answer for antique glassware identification
Antique glassware identification from a photo is usually possible to a useful degree when you focus on a few repeatable clues: construction (blown vs. pressed vs. machine-made), seams and pontil marks, rim and base finishing, color and optical effects, and any visible maker marks. The primary keyword here — antique glassware identification — refers to using these visible traits to narrow age, likely manufacture method, and possible makers.
A single photo rarely gives definitive provenance or market value. Instead, combine clear images of the base, rim, side profile, and the main pattern to create a shortlist of plausible matches. That shortlist is frequently enough to tell whether a piece is hand-blown 19th-century, pressed Victorian, early 20th-century machine-made, or later reproduction.
Use photos to triage: when the clues converge on a specific maker or narrow date range you can rely on the result for research steps. When a photo shows only one ambiguous clue or poor detail, treat the result as provisional and seek specialist confirmation for high-stakes decisions.
Photo checklist
Good photos speed identification and reduce misreads. Take multiple shots that show the overall object plus close details of the features below. Natural, even light and a neutral background will keep color and contrast accurate.
If you plan to use the app, follow the checklist before you scan: one full subject photo, one close detail of the base, and one clear rim/profile shot. Add an item of known scale (a coin, ruler, or a standard object) placed flat in the plane of the base so proportions come through.
- Use a plain background.
- Take one full subject photo and one close detail photo.
- Add a simple scale reference.
- Avoid heavy zoom, blur, shadows, and harsh reflections.
- Capture visible markings, labels, stamps, or context when available.
Visual clues
Start any antique glassware identification by reading construction. Mold seams that run up the body and stop at the rim usually indicate pressed or molded glass; if the seam is ground away at the base or rim it may be later machine-made. An obvious pontil scar (a rough, irregular mark) on the base often signals a free-blown piece finished by a pontil rod, common in hand-blown glass before mass machine production.
Look at the rim and lip: a smoothly finished, fine ground or fire-polished lip often appears on high-quality cut or blown glass, while a distinct applied lip or an uneven, folded rim points to hand finishing. The side profile and silhouette reveal vessel type and period cues: elongated flutes, deep bell shapes, and certain foot styles can be era-specific.
Examine pattern and surface treatment. Cut glass has crisp facets and a light-catching quality; pressed glass patterns repeat exactly and often show seam lines through the pattern. Etched decoration tends to be softer and more irregular when hand-etched, while acid-etched decoration is even and repeatable. Also note that color alone is misleading; pair hue with manufacturing clues and find corroborating marks.
Search for maker marks and stamps on bases and labels. Maker marks can be impressed, etched, enamel-painted, or paper labels. Common clues include impressed names, logos, pontil scars near a maker’s applied pontil, and ground or polished basements that sometimes hide earlier marks. Document any legible letters, symbols, or partial stamps — even fragments narrow search results significantly.
Material cues: lead crystal vs. soda-lime glass can be suggested visually — lead tends to look more refractive and warmer under incandescent light and often rings when gently tapped — but never base important judgments only on sound. Optical effects — such as iridescence on carnival glass, the glow of uranium/Vaseline glass under UV, or the milkiness of milk glass — are reliable visual tests when paired with construction and seams.
- Start with the visible structure before choosing a name.
- Use context, scale, and multiple angles to reduce weak matches.
- Confirm important decisions with local references or a qualified specialist.
Examples by type
Blown, free-form glass (mid-18th to late 19th century): these pieces often show a pontil scar, irregular bubbles, and asymmetry in shape. A blown goblet from the 1800s will commonly have a slightly off-center base, a rough or polished pontil mark, and a lip shaped by tooling. A close base photo showing the pontil scar and the way the glass was finished often separates period-blown from later reproductions.
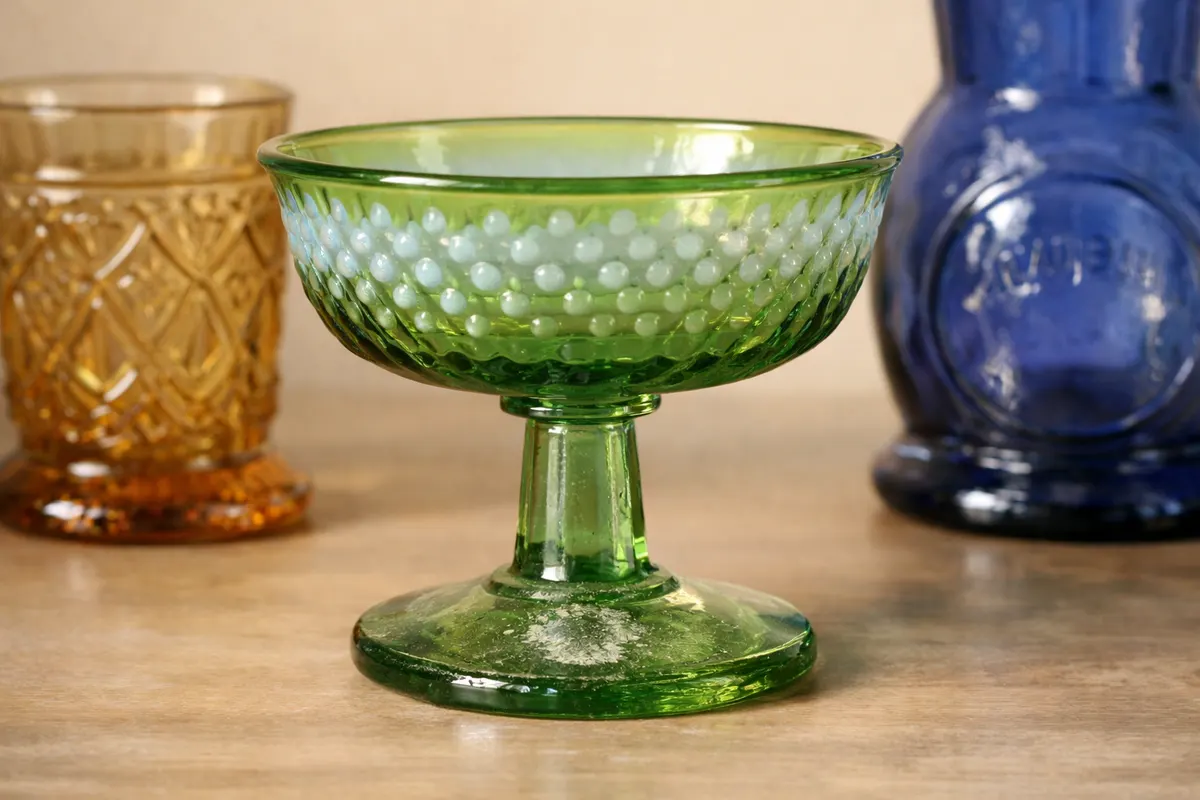
Pressed glass (mid-19th to early 20th century): pressed ware has exact repeating patterns and visible mold seams that stop at the rim or are ground down. A pressed pattern like the popular “hobnail” or “pineapple” will show identical repeats and may have a flat, machine-trimmed base. Photograph the seam line where pattern meets rim or base to confirm press-mold production.
Cut glass and lead crystal (late 19th to early 20th century): cut glass exhibits sharp facet edges, crisp intersection points, and a distinct contrast between polished flats and frosted cuts. If you see crisp, clean cuts with bright flashes and hand-tool marks under magnification, lean toward cut glass by a skilled cutter rather than a pressed imitation.
Machine-made, post-1900 mass production: look for perfectly uniform wall thickness, molded marks that align exactly across joined parts, and lip finishes consistent with automated trimming. A seamless, continuous appearance and stamped or inked factory markings on paper labels are typical.
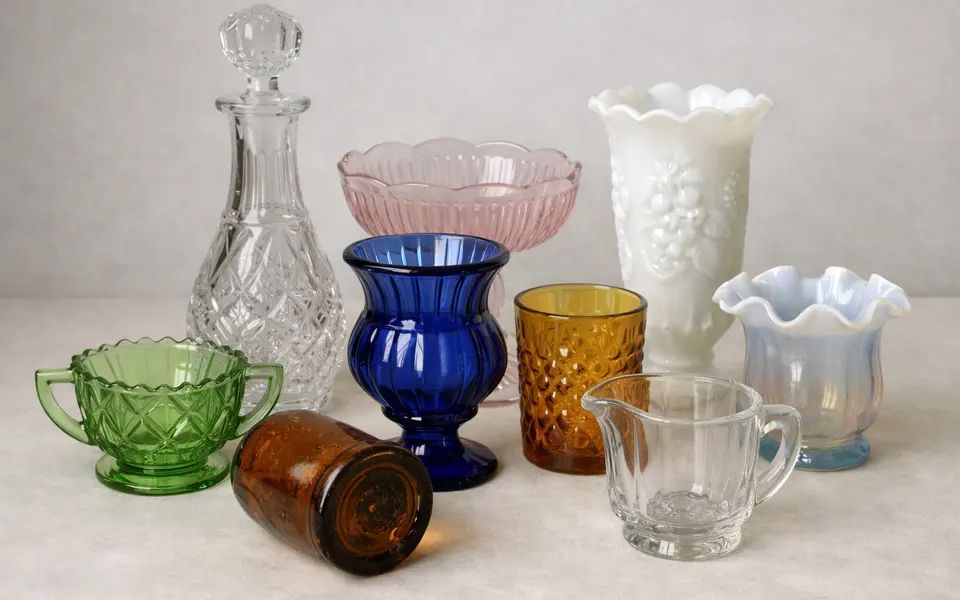
Colored glass varieties (Vaseline/uranium, milk glass, carnival): identify via optical tests where possible. Uranium glass has a slightly greenish-yellow tint in daylight and fluoresces under a UV lamp. Milk glass is opaque white; carnival glass displays an iridescent sheen from metallic salts — photographing these surfaces at an angle and under consistent light helps capture the effects.
- Group examples by visible category first.
- Compare stable traits instead of relying on color alone.
- Explain what extra photo would improve each category.
Compare likely matches
When two possibilities look similar — for example, early pressed glass vs. later molded reproduction — compare at least three independent clues. Use construction (seams, base finish), surface detail (tooling marks, crispness of pattern), and maker signs (labels, impressed marks) together. If all three point the same way the match is usually reliable enough for non-commercial use.
Create a short checklist for each candidate: note seam location and appearance, base finishing (polished, ground, rough pontil), weight and thickness, and any inscription or label fragments. For example, a pressed bowl that is heavy, with machine-squared base and continuous seam, is far less likely to be a hand-cut 19th-century bowl even if the pattern looks similar.
Use comparative photos: place the subject next to a dated example of known origin or take the same shot setup for both items. Differences that look small in isolation — like a faint tool mark on the rim, or the presence of an undercut between foot and body — become decisive when you can directly compare scale and finishing.
- Compare shape, scale, markings, material, and context together.
- Treat similar-looking results as a shortlist until more clues agree.
- Use another photo angle when the answer changes important next steps.
Common mistakes
Relying on a single blurry close-up. Detail shots are essential, but if the only photo shows a distorted rim or a glare-covered base you will likely misidentify whether a seam is a mold seam or a reflection. Always capture an overall profile plus the specific details.
Reading color as the main age marker. Many historical patterns have been reproduced in similar colors for decades. Color alone cannot distinguish hand-blown from machine-made glass. Use color as a supporting clue only when construction and marks align.
Over-interpreting apparent 'marks' without context. A scratch, residue, or restoration can look like a maker’s mark in a photo. Note the mark’s location, depth, and whether it repeats across identical pieces in a service set before concluding it’s a factory stamp.
Skipping specialist confirmation for high-stakes items. If the identification affects buying, selling, or authentication, verify with a catalog, museum record, or a trained appraiser. The app and photo clues are excellent first-pass tools but not a substitute for provenance documents or lab tests when authenticity matters.
- Using one blurry close-up as the only evidence.
- Relying on color instead of stable visible traits.
- Skipping confirmation when the result affects money, safety, or authenticity.
App workflow
Use the app as your first-pass research tool after you collect the required photos: full profile, base, rim, and a close pattern shot. The app can quickly match visual features against known patterns, common maker marks, and similar silhouettes to produce a ranked shortlist — saving you time versus manual catalog searches.
When scanning, feed the app the best images from your checklist. Start with the base photo — many maker marks, pontil scars, and production clues are visible there. Follow with a rim photo and a side profile so the app can cross-check shape and finishing clues. Keep your scale reference visible in at least one image so the app can estimate dimensions.
Treat app results as directional, not definitive. The app's match confidence and suggested keywords will guide your next steps: if the app suggests a maker or narrow date range, use that as search terms in specialist catalogs, auction archives, or glass collector forums for corroboration. If the app returns multiple plausible matches, use the comparative checklist described earlier to eliminate weaker options.
Next steps by confidence level
Strong match (multiple clues agree): Save the match, note the maker and date range, and collect provenance details if possible (purchase history, previous ownership, or labels). Use the app to create a record of your photos and suggested ID, then search auction records and reference books to confirm typical pricing and production context. If the item is to be sold or insured, obtain a formal appraisal or provenance documentation.
Partial match (some clues agree, others conflict): Take the missing photos the identification needs — often an underside, magnified detail, or an inside rim view will resolve the conflict. Re-scan after gathering those images and compare the app’s revised suggestions. Use targeted searches for distinguishing features (e.g., ‘pontil scar + folded rim + hobnail pattern’) in collector databases.
Uncertain match or high-value concern: When identification affects large financial decisions or authenticity matters, seek specialist confirmation. Contact a museum department with a glass collection, a certified appraiser, or a recognized dealer in glassware. Explain which visual clues you have and supply the highest-quality photos; professionals can cross-reference pattern books, factory records, and lab tests when necessary.
- Save strong matches with context.
- Collect one missing clue for partial matches.
- Confirm important results before acting.
Limitations
Do not expect a single photo to prove provenance, maker authenticity, or market value. Photos are excellent for narrowing possibilities but cannot substitute for documentation, physical inspection, or when scientific tests are required (for example, to distinguish a period repair from original production).
Certain identifiers are subtle or obscured in photos: faint enameling, microscopic tool marks, interior labels hidden under washed surfaces, or chemical composition that requires spectroscopy. If a maker’s mark is worn, etched over, or ground away, a photo may not capture the evidence needed to be definitive.
Avoid definitive claims from an image alone when stakes are high. Instead, use photographic identification as a triage step: decide whether the item merits further research or professional examination. When authenticity, health, safety, or major financial value is at stake, request provenance paperwork or an in-person expert opinion.
Related guides
Scan glassware after documenting details
Use Antique Identifier after you photograph the full piece, base, rim, seams, and any etched or molded marks. Treat the scan as an organized shortlist, then verify value, authenticity, or restoration questions with glass references, auction records, or a qualified appraiser.
Frequently asked questions
Can I determine the exact age of a glass piece from a photo?
You can often narrow a date range (for example, mid-19th century vs. early 20th century) using visible production clues like pontil scars, mold seams, and finishing methods. However, an exact year usually requires provenance, maker catalogs, or physical tests. Treat photographic dating as a strong indicator but not a definitive certificate of age.
How can I tell if a glass is Vaseline (uranium) glass from a photo?
Vaseline or uranium glass often appears pale yellow-green in daylight and may have a slightly oily or fluorescent look in photos taken under certain light. The simplest confirmation is a brief UV lamp test: uranium glass fluoresces bright green under UV. Photographs alone can suggest uranium glass but use a UV check or specialist confirmation for certainty.
What is a pontil mark and why does it matter?
A pontil mark (pontil scar) is a rough or polished spot on the base where a pontil rod detached during hand-blown glassmaking. It commonly indicates free-blown or early workshop production and is a useful age/production clue. A clean, polished base or a machine-finished basement is more typical of later machine-made ware.
When should I get a professional appraisal rather than relying on photos and the app?
Get a professional appraisal when the identification affects major financial decisions, legal matters, or authentication (for example, deciding to sell a high-value piece or claiming museum-level provenance). Also seek experts when photos suggest a rare maker or unusual material; professionals can validate marks, check repairs, and consult archival records or lab tests that photos can’t provide.