Pottery Marks Identification by Photo: Maker Stamps, Symbols, and Base Clues
Use photo clues, maker stamp details, base marks, glaze context, comparison steps, and safe next checks for pottery marks identification by photo.
Quick answer for pottery marks identification by photo
Pottery marks identification by photo is often possible to a useful degree: a clear base photo can show the mark type (printed, impressed, incised, or painted), clay color and texture, foot/rim construction, and firing clues that narrow region and date ranges. Those combined visual clues usually let you rule groups in or out (for example, a hard, translucent white paste with an underglaze blue stamp reads as porcelain; a red-brown earthenware body with a hand-incised mark reads as domestic earthenware).
What a single good photo can rarely do is prove exact maker, precise year, or market value. Many factories reused marks, shops applied transfer labels, and modern reproductions copy historic stamps. Use the photo as a first-pass filter: identify mark type and likely region, then add rim, profile, and decoration photos to raise confidence.
Practically: start with a sharply focused, well-lit shot of the base (no flash glare on the mark). If the mark is faint, an oblique raking-light shot will reveal impressed or incised lines. Keep expectations realistic — a clear photo often yields a confident shortlist rather than a single, absolute identification.
Photo checklist
Before you open any references, photograph these views in this order. The app and a human expert use the same visual cues: base-mark detail, scale, construction, and surrounding glaze. Each shot answers a different question about maker, date, and manufacture method.
Use a plain neutral background, steady camera (use a small tripod or steady hand), and daylight or continuous LED lighting. If the mark is glazed over, take an oblique shot to avoid reflections; if the mark is impressed, take raking light from the side to cast shadows and reveal depth.
Include a scale (a ruler, coin, or business card) and show context: a photo of the whole vessel from one side and another of the rim/profile. These extra shots let you confirm whether the mark aligns with the shape and glaze — two critical cross-checks.
- Base close-up: fill the frame with the mark, sharp focus, no flash glare.
- Oblique raking light: side light for impressed/incised marks and surface texture.
- Whole-object shot: profile and rim to check shape and proportion.
- Foot/inner-foot detail: construction, firing spurs, kiln grit or glazing on the foot.
- Scale reference: coin, ruler, or 1–2 cm reference in the same plane as the mark.
- Decoration/pattern close-up: transfer borders, hand-paint strokes, brush marks.
- Clay body slice or translucency test (porcelain): hold to light for thin pieces to check translucency).
Visual clues
When working from photos, prioritize stable, observable clues rather than stylistic impressions. The most diagnostic visual clues are mark type (impressed, incised, printed, painted), clay body color and texture, foot construction, glaze finish and fit, kiln marks, and pattern technique (transfer print, hand painted, decal). These clues map to manufacturing methods and regions — for example, a heavily grogged red earthenware body rarely equals fine bone porcelain.
Clay and paste: note color (white, cream, buff, red), grit (presence of sand or grog), and translucency. Porcelains that transmit light at the thin rim are typically kaolin-rich and often point to higher-fired factories. Earthenwares with coarse inclusions usually indicate later, cheaper mass-produced wares or early utilitarian pottery.
Mark details: printed backstamps and underglaze blue stamps can often be matched to known types but beware of retailer labels and later reproductions. Impressed marks—letters, numbers, or makers’ symbols—tend to be factory-specific but need raking light to capture depth. Hand-painted signatures require high-resolution close-ups to distinguish painter’s hand from later fakes.
- Impressed/incised: look for depth and tool marks (best seen with raking light).
- Printed/transfer: check ink spread under glaze; underglaze cobalt blue sits under glaze and resists wear.
- Painted marks: look for brush strokes, uneven pigment, and overglaze vs underglaze placement.
- Foot rim: unglazed vs glazed, trimming marks, soot or kiln grit reveals firing environment.
- Crazing and wear: distribution indicates age/use pattern but can be reproduced artificially.
Examples by type
Transfer-printed earthenware: Photo clues include crisp black or blue printed lines, an off-white earthenware body, and a flat glazed surface. Close-up of the mark often shows a printed retailer or factory imprint; compare edge wear to see if the transfer is original (consistent wear) or a later decal (sits on top of later restorations).
Hard-paste/porcelain with underglaze blue marks: these pieces often show a fine white paste, sharp underglaze cobalt marks, and a smooth glaze that flowed during firing. If the mark is underglaze (no surface brush or sticker sheen), the photographic evidence for age and origin is stronger — but still check for copied marks.
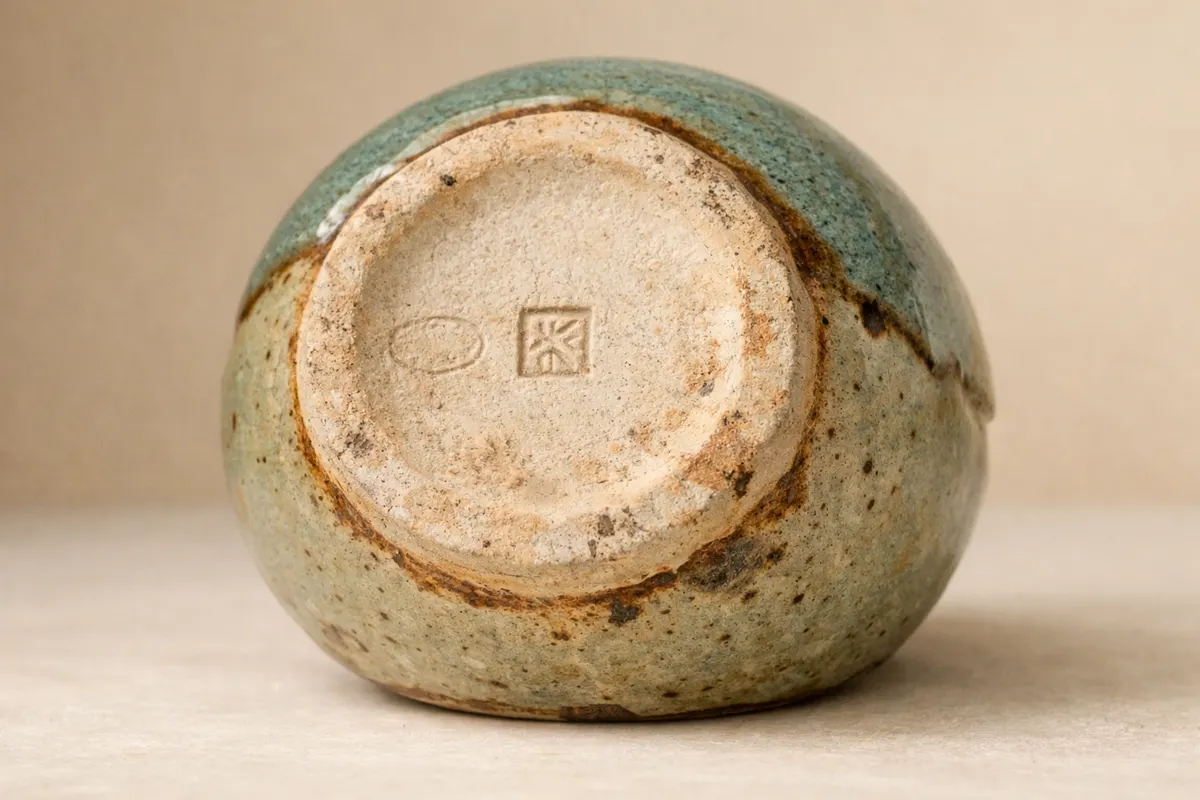
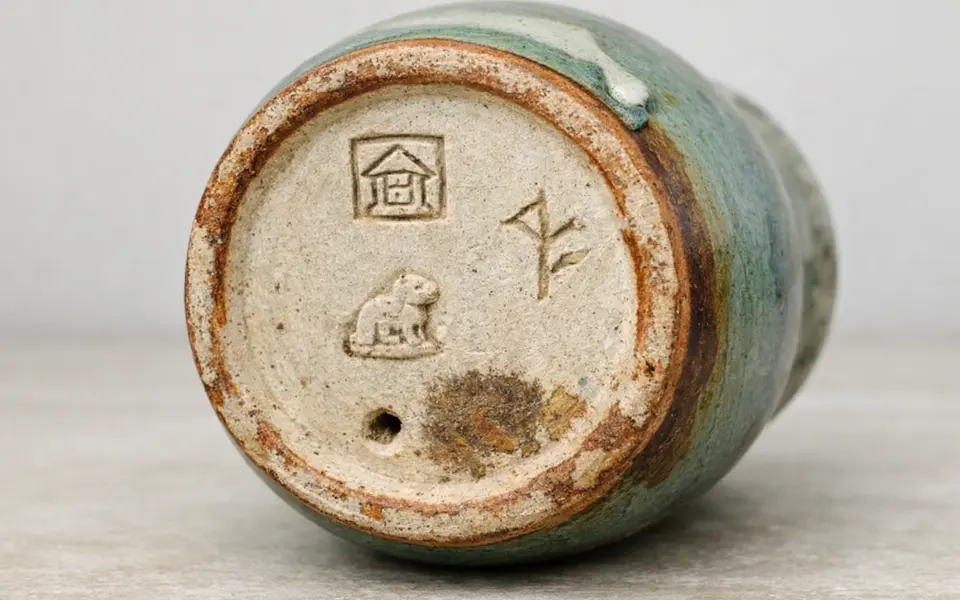
Studio or wheel-thrown pottery: look for hand-incised initials, kiln stamps, and glaze drips on the foot. The base often shows tool marks (trimming lines) and a different clay exposure. These physical construction clues point to studio production rather than factory mass production.
- Stamped, impressed letters: often factory batch or model numbers; photograph full sequence and spacing.
- Paper/adhesive labels: useful provenance but not maker proof; show label front and back.
- Gilding and overglaze decoration: photograph edge of gilt to see wear and whether it sits above the glaze.
Compare likely matches
When photos return similar-looking marks, separate candidates using at least three independent clues: mark style, clay/paste, and construction (foot, rim, and decoration technique). A printed crown mark on a mid-brown earthenware base is different from the same crown printed on a white translucent paste; that single difference may eliminate certain factories or eras.
Use the object’s shape and decoration as tie-breakers. For instance, two pottery marks that look identical might belong to different firms if one maker produced small cups and another produced large tureens with distinct molded rims. Comparing the vessel’s silhouette, handle style, and transfer border pattern helps narrow results.
Ask for or take targeted extra photos when matches remain close: interior glaze edge (to see where glaze meets foot), maker’s code sequences impressed into the rim, and microscopic detail of brushstrokes or transfer plate halftone dots. These extra photos often reveal production clues invisible in a single mark image.
- Match 1: mark + clay color + foot construction = probable factory A.
- Match 2: mark + decoration technique + kiln spurs = probable factory B.
- If both match equally: gather provenance, manufacturing codes, and historical catalog references.
Common mistakes
Over-relying on a single detail: people often fixate on a small symbol and ignore the body or glaze. A symbol can be reused, printed as a retailer’s mark, or forged. Always check the clay, foot, and glazing pattern before locking in a maker name.
Poor photography: glare, out-of-focus marks, or no scale lead to misidentification. Flash glare can hide painted marks; oblique lighting or cross-lighting reveals impressed and incised marks. Low-resolution crops magnify texture and make printed marks look hand-painted — keep the whole mark in frame at high resolution.
Assuming pattern equals maker: transfer patterns were traded and copied widely. The same floral border could appear on wares from multiple Staffordshire factories or later reproductions. Use pattern as a supporting clue only.
- Avoid assuming the clearest-looking mark is original — it may be a later decal or repaint.
- Don’t identify solely from design style; combine mark, clay, and foot evidence.
- Beware of modern reproductions with artificially aged crazing or intentionally distressed bases.
App workflow
Use the Antique Identifier iOS app as a structured second pass after you collect the photos from the checklist. Start by scanning the base mark with the app’s camera tool or import the high-resolution photo from your phone’s library. The app compares the mark image and returns ranked candidate matches along with notes about mark type, probable region, and similar reference images.
Treat the app’s results as curated leads, not final proof. The app is most helpful when you attach the supporting photos requested: foot rim, profile, and decoration close-ups. These additional images let the system or a human reviewer check whether the mark aligns with the object’s construction and glaze — essential cross-checks for a reliable ID.
If your item is glassware or the mark’s appearance suggests mixed-material verification, see the related guidance: Antique Glassware Identification: Shape, Color, Seams, and Maker Clues (https://antiqueidentifierbypicture. app/blog/antique-glassware-identification). That article uses the same photo-first approach and helps when ceramic pieces include metal mounts or glass inserts.
Next steps by confidence level
High-confidence match: If multiple clues align (mark type, paste, foot, and decoration) and the app returns high-similarity references, document the ID with annotated photos and provenance notes. For valuable pieces, follow up with auction records, reference books, or a professional condition and authenticity check before making sale or insurance decisions.
Partial match: If the mark aligns but clay or construction is ambiguous, gather more photos emphasizing the foot, rim, and a cross-section of the unglazed body if possible. Seek corroboration from specialized collector groups, dedicated pattern books, or museum databases that list factory marks and model numbers.
Uncertain or conflicting results: When photos produce conflicting clues (e. g. , a porcelain mark on a visibly earthenware body), do not rely on the image alone. Consider physical inspection by a local ceramics specialist, lab testing for paste composition in high-value cases, or sending detailed images to a trusted institutional archive.
- Strong ID → annotate photos, document provenance, consult price records for valuation.
- Partial ID → get close-up photos of construction details, compare maker’s code sequences.
- Uncertain → seek in-person expert verification or lab analysis if the piece has significant monetary or historical importance.
Limitations
A single photograph has inherent limits. Marks can be reapplied, copied, or faked. Factory marks were often reused across decades and even by different workshops. Photography can misrepresent color and texture; lighting and camera settings change the look of glazes and pastes. Treat a photo-based ID as a working hypothesis rather than conclusive evidence.
For age, value, or authenticity: photos can strongly suggest period and manufacturing method but cannot provide absolute authentication or a market appraisal. High-value or rare objects should be examined in person by a qualified appraiser, conservator, or museum curator. Physical tests (thermoluminescence, microscopic paste analysis) are sometimes necessary when the stakes are high.
Be cautious with maker names. When a photo suggests a well-known factory, say it 'matches X-style marks' or 'is consistent with marks used by X’s factory' rather than asserting a definitive maker unless multiple independent lines of evidence support that attribution.
- Separate high-confidence, partial, and uncertain outcomes.
- Tell the reader when to verify with a trusted source or professional.
Related guides
Try Antique Identifier with a clear base-mark photo
Use the Antique Identifier iOS app as a first pass: take a sharp close-up of the base mark with scale, add profile and foot shots, then scan them with the app to get ranked candidate matches and specific clues. Treat results as a starting point — confirm high-value or uncertain items with additional photos, reference checks, or a trusted specialist.
Frequently asked questions
What is the single most important photo to take for pottery marks identification?
A sharply focused, well-lit close-up of the base showing the entire mark with a scale reference. If the mark is impressed, use oblique raking light to capture depth. That image, combined with a whole-object profile and a foot/inner-foot shot, provides the three most useful views for initial identification.
Can a photo alone prove the pottery’s age or value?
No. A photo can provide strong clues about manufacturing technique and likely period, but it cannot definitively prove age, provenance, or market value. For high-value items, in-person inspection and sometimes laboratory tests are required for authentication and accurate appraisal.
What should I do if the mark is worn or partially missing?
Take multiple photos at different angles and lighting, especially oblique light to reveal shallow impressions. Photograph the surrounding clay, foot, and decoration to collect other corroborating clues. Upload these images to the app or show them to a specialist; combined clues often allow identification even when the mark is incomplete.
How can I tell if a mark is a later reproduction or a genuine factory mark?
Look for inconsistencies: modern printing methods (dot patterns from digital printing), adhesive residue from a label, or a mark that sits clearly on top of later overglaze restoration. Compare clay and construction: if the mark indicates a fine porcelain factory but the body is a coarse earthenware, that mismatch suggests a reproduction or later relabeling. When in doubt, seek expert physical inspection.