

How to Identify Depression Glass: Patterns & Colors
Learn which photo clues can confirm age, which traits need further checks, and practical next steps for how to identify depression glass reliably.
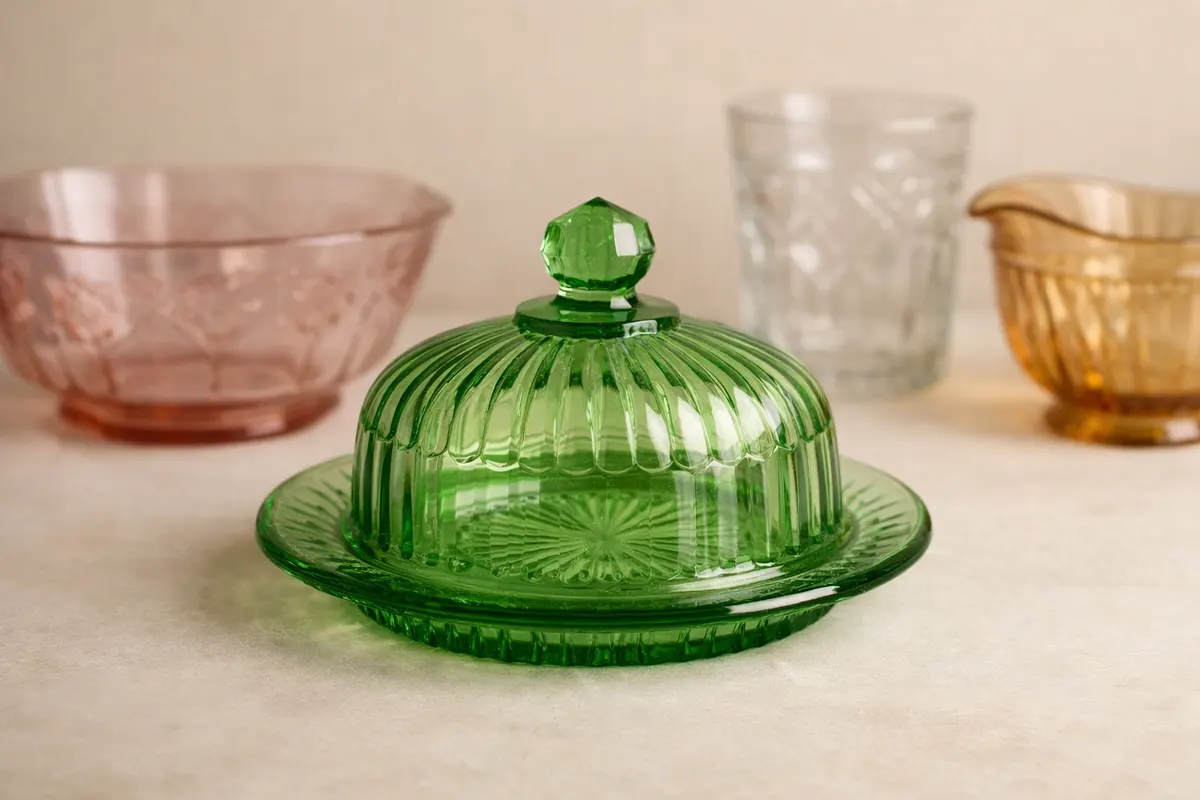
Quick answer for how to identify depression glass
How to identify depression glass starts with photographing and comparing clear, repeatable visual clues: mold seams, surface wear, injection bubbles, and characteristic colors under consistent light. A single photo can often rule out obvious reproductions or modern machine-made glass by showing things like crisp, symmetrical mold lines or highly consistent thickness that didn’t exist in most 1920s–1940s pressed wares.
Photos alone rarely prove maker attribution or exact date. Use crisp close-ups of the rim, base, and pattern repeat alongside a full-shape photo and one backlit shot to check thickness and inclusions. After you collect those images, compare them to published pattern plates or maker catalogs; where uncertainty remains, consult a specialist or the site’s identification resources for a reasoned second opinion.
What depression glass identification involves
Depression glass identification is the process of judging whether a piece was produced in the Great Depression era (roughly the late 1920s to the early 1940s) and whether it matches known pressed-glass patterns and manufacturing traits from that period. Identification combines visible physical traits — mold lines, pontil marks, thickness, and wear — with contextual evidence such as provenance, labels, or original boxes when available.
From a photography standpoint, identification is a layered task: start with documentary-style images that capture the whole object, then add controlled close-ups to isolate clues. For many collectors and sellers, the goal is practical: determine if an object is a Depression-era pressed pattern, a later reproduction, or a later mass-produced lookalike.
I recommend taking at least four photos before you compare references: a full-profile shot showing shape, a backlit image to evaluate thickness and internal bubbles, a close-up of the pattern repeat and any maker marks, and a base/rim detail to check seams and finishing. These images let you eliminate obvious mismatches and focus your research on specific pattern catalogs or maker marks.
Assessing depression glass colors
Color is a primary clue for dating and matching Depression-era pieces, but it is both helpful and hazardous: color shades like pale green, vaseline (uranium) yellow-green, pink, and cobalt blue were common, yet glassmakers reused colorants and modern dyes can mimic older tints. Note the color under neutral daylight and with a consistent background; photographs taken under tungsten or mixed light can mislead unless you correct white balance.
Surface and internal clues often pair with color to increase confidence. For example, a pale green plate with characteristic oil-spot wear, slight mold flash on the rim, and occasional seed bubbles in the glass fits typical pressed ware from the 1930s more closely than a perfectly uniform mass-produced green made decades later.
What to photograph next: place the piece on a white card and shoot one backlit image to reveal internal bubbles and striations, and another in diffuse daylight to show the true tone. Include a small color standard or neutral card in frame if you hope to compare shades across reference photos later.
- Look for internal seed bubbles and stringers visible in backlit photos — common in older pressed glass.
- Check the base and rim in macro shots for mold seams and any ground or polished surfaces.
- Note finish irregularities: hand-finished pontil scars or rough ground bases point away from later machine-made production.
- Use a neutral background and a color card when photographing tint-sensitive pieces; this makes shades comparable to catalog images.
Step-by-step photos to identify depression glass
Start with a reproducible photo checklist: full-profile, three-quarter angle, backlit, rim close-up, base close-up, and a pattern repeat close-up. These six images let you appraise shape, thickness, pattern repeat frequency, and finishing. When shooting, use a tripod or a steady surface to keep scale and focus consistent across shots.
Measure and record dimensions: diameter, height, mouth or rim opening, and base diameter. Pattern books and maker plates often specify repeat counts or measurements that distinguish almost-identical patterns; including a scale (a ruler or a coin) in one of your photos is essential for accurate comparison.
Next, compare photos to reference sources. Use museum collections, printed pattern books, or curated online plates to match motifs and repeat counts. If you find a likely match, document the reference plate and note any small differences. If a match is close but not exact, check production clues — are the seam lines consistent with the claimed date? Do air bubbles or tooling marks align with period manufacturing methods?
- Photo checklist: full profile, backlit, rim, base, pattern repeat, and a scale shot.
- Record measurements (mm or inches) and condition notes with each image.
- Compare repeat counts: count motif repeats across the diameter for bowls and plates.
- Look for maker marks, embossed letters, or decals and photograph them at high resolution.
- When uncertain, catalog the closest matches and list specific differences (e.g., 'rim bevel 3 mm wider').
Examples
Example 1 — A pink sandwich plate with slight mold flash around the rim and tiny seed bubbles visible in the backlit shot: those signs, combined with an irregular base finish, point to pressed production from the Depression era rather than a later machine-pressed reproduction. Pattern repeat (six motifs evenly spaced) matched a known catalog plate for a 1930s manufacturer.
Example 2 — A bright green bowl that glows faintly under a UV light but shows perfectly uniform thickness and no seed bubbles in backlit photos: those traits often indicate postwar reissued glass or modern factory reproduction. Glow alone is not conclusive — it helps if paired with finishing and manufacturing clues.
Example 3 — A clear compote with a crisp, sharply defined geometric pattern and a perfectly ground base: when close-up photos show that the mold lines are too sharp and the pattern repeats are mechanically precise, the piece is more likely a later machine-made item inspired by Depression shapes. In that case, provenance or an original label becomes important to support any early-date claim.
Limitations
A photo-based study can eliminate obvious mismatches and narrow possibilities, but it rarely proves maker or exact date beyond reasonable doubt. Reproductions and later factory presses can copy pattern motifs closely, and color matching from photos is vulnerable to lighting and camera sensor differences. If you need a valuation, legal proof of authenticity, or a date for insurance, follow up with a qualified appraiser or a specialist reference that supports physical inspection.
Separate outcomes into high-confidence, partial, and uncertain. High-confidence results come when multiple independent clues align — correct shape and pattern repeat, authentic period wear, era-appropriate color, and a base finish matching period tooling. Partial conclusions occur when a piece matches in some areas but differs in finishing or provenance. Uncertain outcomes require in-person inspection or specialist verification.
Practical next steps: keep your photos organized and labeled, note the reference plates you checked, and consult trusted resources such as the site’s identification hub (https://antiqueidentifierbypicture.app/identify/antique-glassware-identification) or the curated examples for vase shapes (https://antiqueidentifierbypicture.app/examples/antique-glassware-identification/antique-glass-vase-identification). For purchase or insurance decisions, arrange a professional review rather than relying on photos alone.
- High-confidence: matching pattern, consistent period wear, and correct base finishing.
- Partial: shape and color match, but finishing or seam evidence is inconsistent.
- Uncertain: image-only evidence with ambiguous or missing base/rim details — seek a specialist.
Related guides
Next step: use photo-first reference checks
If you’ve taken the recommended photos, compare them to curated reference plates on the site’s identification hub (https://antiqueidentifierbypicture.app/identify/antique-glassware-identification) or use the example guides for specific shapes (like vases) to narrow possibilities. When you want a faster, research-oriented match from your images, consider the Antique Glassware Identification tool at https://antiqueidentifierbypicture.app/tools/antique-glass-identification as an optional next step — treat its result as a research lead and verify with a specialist for valuations or provenance claims.
Take the next step →Frequently asked questions
What are common depression glass patterns I should photograph?
Photograph close-ups of the repeating motif, including a full-width shot that shows how many repeats fit across a plate or bowl. Common Depression-era patterns include geometric fans, floral sprays, hobnail variants, and lattice or diamond grids; each has a characteristic motif spacing and edge treatment. A high-resolution pattern repeat photo helps you compare motif counts to pattern plates — for example, count how many fans appear from rim to center or how many lattice diamonds wrap the circumference. Include a ruler or scale in the shot so you can match repeat frequency to published plates more accurately.
How can I tell by photos if a piece is an original or a reproduction when doing depression glass identification?
Start by photographing the rim, base, and a backlit view for internal bubbles or striations. Originals often have slight irregularities — seed bubbles, soft mold flashing, and uneven base finishing — that reproductions tend to lack. Reproductions usually show excessive uniformity, very crisp mold edges, or modern tooling traces. Also check provenance: period labels, original boxes, or consistent ownership history increase confidence. If photos reveal mixed signals (for example, period color but ultra-clean finishes), mark the result as inconclusive and seek specialist verification.
How should I photograph subtle tint differences to evaluate depression glass colors?
Use diffuse natural daylight or a consistent daylight-balanced lamp and include a neutral gray or white card in frame to correct color in post-processing. Backlit shots reveal how the tint transmits through the thickness; a thin object may look lighter than a thick one. Photograph the piece next to a known reference (another museum-quality photo or color standard) when possible. Avoid automatic camera filters or mixed lighting — these change perceived tone and make color comparison to catalog images unreliable.
When is it worth using an app or paid service to check my Depression-era glass?
After you gather the recommended photos and do basic reference checks, using an identification tool is a good next step for narrowing possibilities quickly. An app can match motifs and highlight likely pattern candidates, but treat its result as a research lead rather than a definitive attribution. If the piece may have significant monetary or historical value, follow app findings with an expert appraisal or an in-person museum/auction-house consultation before making high-stakes decisions.