

Vintage Glassware Patterns: Shapes, Seams, Colors, and Maker Clues
Learn which visible clues—mold seams, base marks, shape repeats, and color overlays—reliably point to vintage glassware patterns and what they can’t prove.
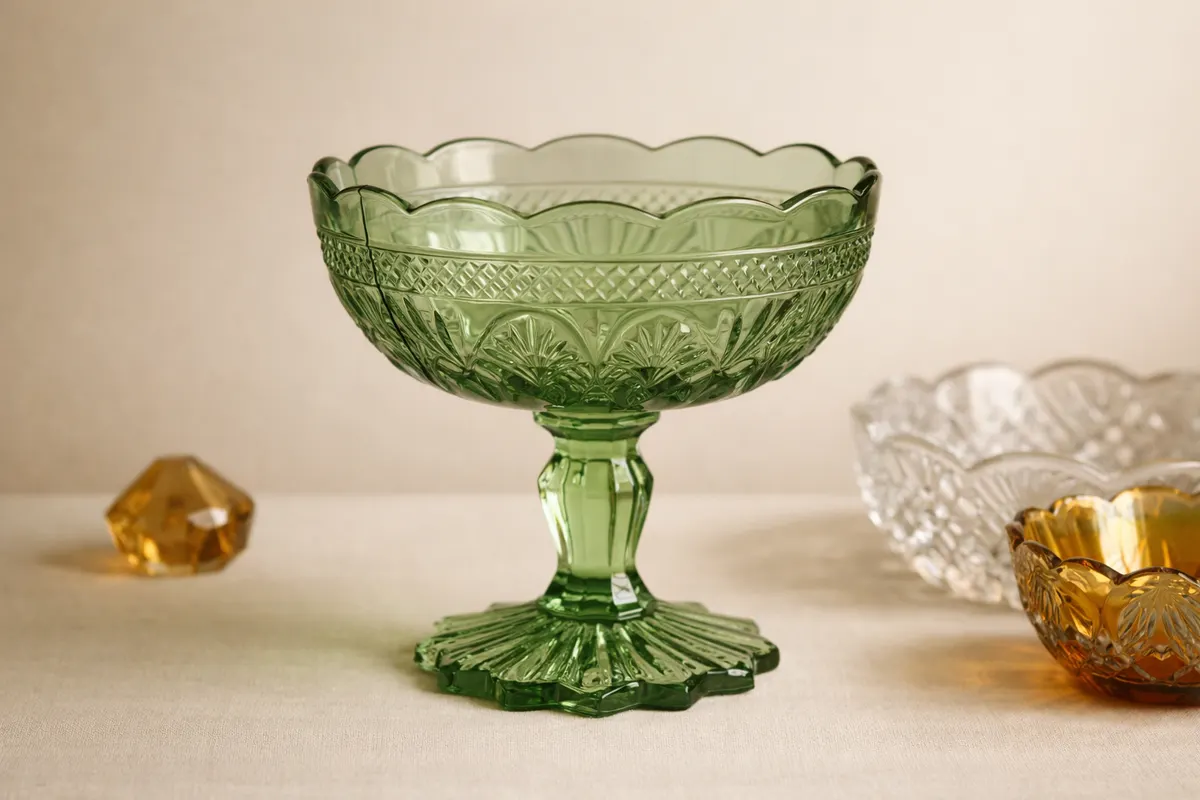
Quick answer for vintage glassware patterns
Vintage glassware patterns are best assessed as a combination of visible clues rather than any single telltale trait. In photographs, shape, seam placement, base details, and construction features usually give the clearest signals; color and surface decoration can help, but they are often altered by lighting and reproduction glass.
When you’re working from photos, prioritize features that survive angle and exposure changes: how the rim is finished, whether mold seams reach the base, the presence of pontil scars or polished bases, and repeated surface motifs in the pattern. Those elements narrow possible production methods and era, which in turn limits maker possibilities.
Keep expectations realistic: a clear seam that runs to the base strongly suggests a mold-made piece, while a pontil scar or hand-polished base points toward mouth-blown glass. Neither alone proves maker or exact age. Use these clues to build a shortlist of candidate patterns and then compare multiple details before drawing conclusions.
If you want a deeper walkthrough after checking these clues, use a stepwise comparison and, when you’re ready, treat a scanning tool as a first-pass research aid—recording any uncertain results as notes to verify with experts or reference sources later.
Strongest visual clues
Some clues are surprisingly robust in ordinary phone photos and are therefore the best starting point when evaluating vintage glassware patterns. Shape and silhouette are primary: the profile of a bowl, stem, foot, or pitcher—especially abrupt transitions like a deep collar, a sharply flared rim, or a heavy foot—often correlates with specific pattern families.
Seams and mold evidence are among the most reliable signals. A visible seam that runs up the side and stops at the lip can indicate a two-piece mold; a seam continuing across the base almost always indicates a multi-part mold. Conversely, an absence of seams combined with a polished or ground pontil area points to older mouth-blown work.
Base and rim treatments survive photography well and carry production information. Look for polished bases, ground pontils, rough pontil scars, applied rims, or crimped edges. These details tell you about finishing methods and, by extension, likely production dates and maker traditions.
Surface pattern repeat and tool marks matter. Consistent, machine-pressed repeats with crisp edges typically indicate pressed glass from the 19th–20th centuries; fine wheel-cut or engraved motifs, or overlays with hand-cut decoration, suggest higher-end finishing that narrows the maker pool.
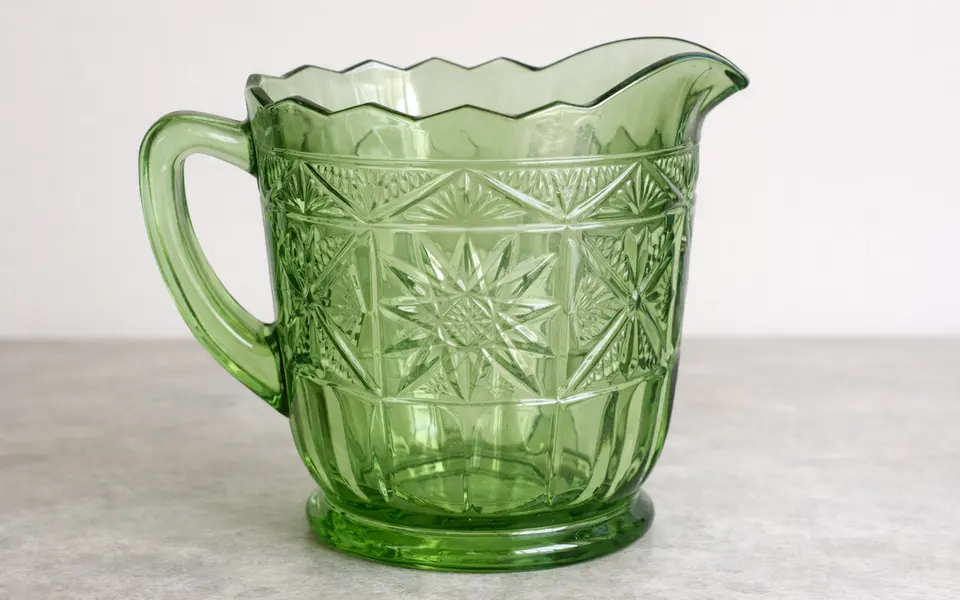
- Seam placement: seam to base = molded, seam stopping at lip = two-piece mold, no seam + pontil = mouth-blown.
- Base/pontil clues: rough pontil = older mouth-blown; polished or ground base = intentional finishing; applied base = later assembly.
- Silhouette: profile proportions (height-to-width, stem length, foot diameter) help match pattern families.
- Surface repeat: crisp, identical repeats suggest pressed production; slight irregularities suggest handwork.
- Decoration technique: etched or engraved lines are different from acid-etched or sandblasted surfaces—each ties to specific eras and makers.
Weak signals
Color alone is a weak signal. Lighting, camera white balance, and glass chemistry all change how a hue reads in a photo. For example, uranium glass’s yellow-green glow is distinctive under UV light but can look ordinary in daylight photos. Similarly, flashed or cased glass can appear to be solid color depending on exposure.
Surface wear and minor chips can mislead. A worn highpoint might make a pattern look shallow or different from reference photos taken of mint items. Reflections and glare often create false highlights that mimic pattern details or hide seam lines.
Small embossed logos, paper labels, and stickers are sometimes definitive, but labels can be added later and paper is fragile—lack of a label is not proof of age. Also avoid overinterpreting generic motifs: hobnail, ribbing, and basic florals were produced across many manufacturers and decades.
- Do not rely on color as the primary identifier—confirm with construction clues.
- Glare, reflections, and camera compression can hide or fake pattern repeats.
- Paper labels or stickers help but can be modern additions; treat them as supporting evidence, not proof.
- Common motifs (ribbed, hobnail, shell) are not exclusive to single makers.
Comparison workflow
Work methodically: gather multiple photos and notes, then compare them to reference examples. Start with a straight-on profile photo to read silhouette, a close-up of the rim and base to check seams and finishes, and a macro of the pattern repeat so you can count motifs per inch or measure repeat spacing.
Create a short checklist for each candidate match. For any likely pattern: note seam location, base finish, motif repeat, measurement goals (height, diameter, stem length), and any applied elements. If a reference photo of a pattern has a matching seam break, base treatment, and identical motif spacing, it’s a strong candidate for further research.
Use comparative evidence, not isolated hits. If two different makers used a similar hobnail texture, the deciding factors might be the rim finish or the base treatment. Narrow matches down by checking three independent clues that are visible in both the subject piece and the reference.
If you want additional curated reading, the guide 'Antique Glassware Identification: Shape, Color, Seams, and Maker Clues' collects common pattern families and finishing techniques and can be helpful when you need deeper maker-level context.
- Photograph at least three views: profile, rim/base close-ups, and a detail of the pattern repeat.
- Measure motif repeat and key dimensions to compare against references.
- Score candidate matches by independent clues (seam, base, rim, motif)—prioritize those with 3+ matching features.
- Keep a running list of uncertainties and follow up with literature or a trusted specialist for confirmation.
App workflow
After you’ve recorded the strongest clues and run your comparison checklist, use a scanning tool as a research amplifier. Open Antique Identifier and feed it the same set of images and measurements you collected—profile, rim/base close-ups, and motif detail—so the app can compare multiple visual cues at once.
Treat search results as candidate matches, not final answers. The app can surface likely patterns and similar images quickly, which saves time on manual searching; but always cross-check those candidates against the seam, base, and rim evidence you already recorded.
Use the app’s notes or tagging features to mark uncertain results and to track which clues supported a suggested match. If a suggested match aligns with three independent clues (for example: identical seam termination, matching base finish, and consistent motif repeat), it’s worth deeper investigation in specialized references or with an experienced identifier.
If you want extra reading on construction clues before using the app, consult the related guide 'Antique Glassware Identification: Shape, Color, Seams, and Maker Clues' for expanded examples of how seams and bases vary across common pattern groups.
- Scan the same multiple views you used for manual comparison—don’t rely on one photo.
- Use app results to build a shortlist, then verify with seam, base, and rim evidence.
- Tag or save candidate matches and note which physical clues align with each suggestion.
- Treat app matches as research leads; follow up with reference books or an expert when identification matters for sale, insurance, or conservation.
Related guides
Try Antique Identifier after you check visual clues
Use Antique Identifier as a next step once you’ve recorded shape, seams, base finish, and motif repeat. Scan multiple clear views and treat results as research leads—save uncertain matches as notes and confirm with reference sources or a specialist when necessary. Start with methodical photos, then let the app accelerate your shortlist.
Take the next step →Frequently asked questions
Can a single photo definitively identify a vintage glassware pattern?
No. One photo can suggest likely matches but cannot prove maker, age, or authenticity. Use multiple photos and construction clues—seams, base, rim, and repeat spacing—to narrow possibilities before seeking expert confirmation.
How do I tell if a seam means the piece is machine-made?
A seam that continues across the base or finishes consistently at the rim usually indicates a multi-part mold and mechanized pressing. By contrast, irregular seam breaks, polished pontils, or hand-applied rims point toward earlier mouth-blown or hand-finished work.
Is color a reliable way to identify pattern or maker?
Color is a helpful supporting clue but not definitive. Photographic lighting, overlays, and restoration can alter color. Always confirm color-based hunches with stable construction clues like seams, base finishes, and motif repeat.
What’s the best way to prepare photos before using a scanning tool?
Take at least three clear images: a straight-on profile, a close-up of the rim and base to show seams and finishing, and a detail of the pattern repeat. Use diffuse lighting, remove distracting backgrounds, and include a small ruler or coin for scale when possible.