Silver Hallmarks Identification
Silver Hallmarks Identification: A Visual Guide With Example Cases
Understand silver hallmarks identification by photo: what marks you can spot, what a result reports, and the next steps before relying on one image.
Silver hallmarks identification helps you narrow an object’s origin and metal quality from what is visible: numeric purity marks (like 925), assay office punches, maker’s initials, and how the item is constructed. A clear photo of the hallmark area, plus shots of joins and wear, lets an identification tool propose likely matches and show where the evidence is strongest or weak.
A photo-first ID is the fastest first pass because many hallmarks are standardized and published. When a photo shows an intact maker’s punch or a readable assay office mark, the app can compare those symbols against reference sets and return probable country, date range, and silver standard—without claiming final authentication.
Treat the photo result as guided evidence: it points to likely readings and recommended next checks (magnified inspection, acid or XRF testing, and expert verification) rather than a standalone appraisal. Use the suggested next steps to decide whether further testing or a specialist is warranted.


How identification works
Step 1
Snap a photo
Take a clear, well-lit photo of your item in the Antique Identifier By Picture app.
Step 2
Get an instant identification
The app reads the visible clues and returns the closest matches in seconds.
Step 3
Review the details
Compare the result with your photo, review any uncertainty, and check the suggested next steps.
Key visual clues for silver hallmarks identification
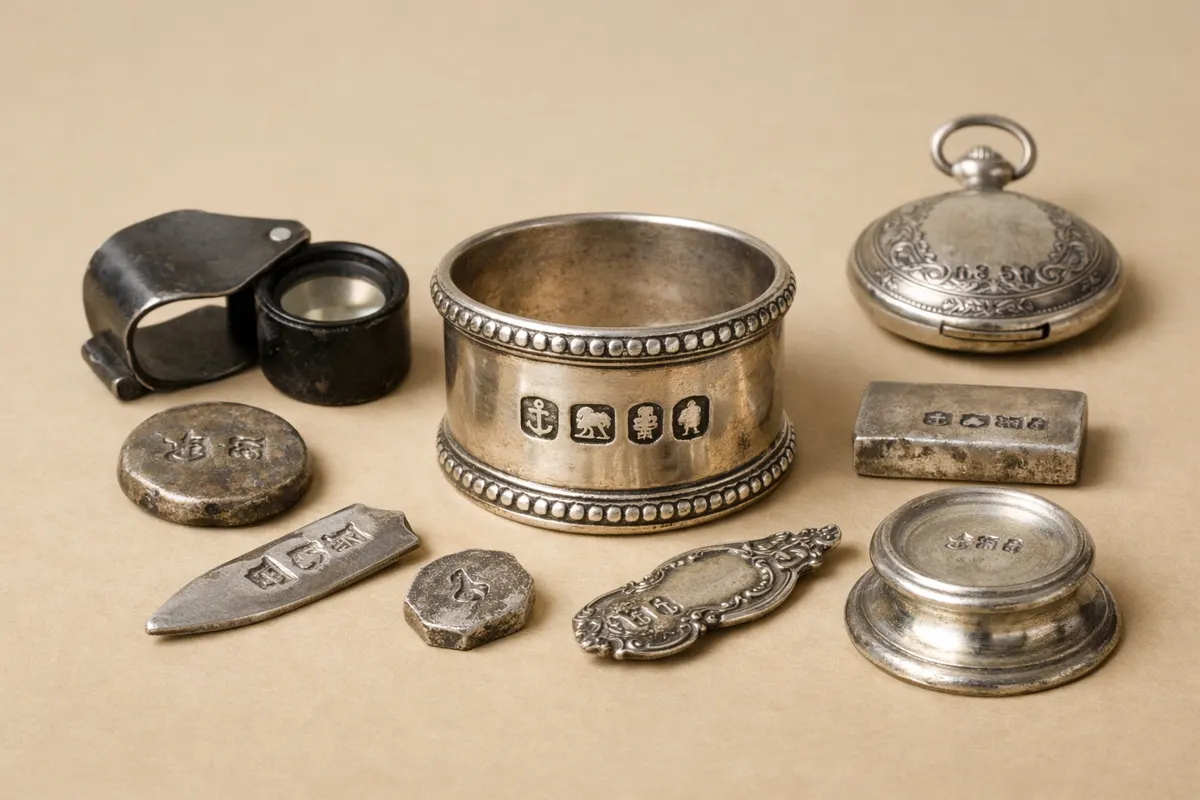
Start with location and context: hallmarks are most often inside rings, on the inner lip of bowls, the inside case of pocket watches, and the back or underside of flatware. Photographs that show both the object and a close-up of the punch in the same frame help match scale and placement.
Look for numeric and assay marks. Numeric stamps such as 925, 800, or 958 indicate common silver standards; British assay office punches (a crowned leopard’s head, an anchor, a lion passant) and date letters are distinctive and highly informative when legible.
Assess maker’s marks and punch style. Maker marks are typically small letter-pairs or symbols in a rectangular or circular punch. Sharp, deep punches usually indicate original factory marks; uneven, shallow, or misaligned marks can signal repair, re-stamping, or counterfeit attempts.
Check construction and wear. Seams, solder lines, hinge work on boxes and pocket watches, and the presence of a cuvette (inner case) are routine watch and box clues. Natural patina and consistent wear patterns support age claims, while exposed base metal at worn edges often reveals plating or mixed metals.
- Where to photograph: inside ring bands, bowl undersides, watch cuvettes, and handle backs.
- Useful visible marks: numeric purity stamps (925, 800), national assay symbols, maker’s letter punches.
- Construction cues: hinge work, solder joints, stamp placement consistency, and weight relative to size.
- Condition signs: even patina vs. fresh polishing, exposed base metal at wear points, and corrosion on non-silver alloys.
What a silver hallmarks identification report includes
A category-specific ID report focuses on fields that are meaningful for silver pieces: the likely item type (ring, flatware, watch case), a best-fit silver standard (sterling, coin silver, continental marks), candidate maker matches, and a country or assay office attribution when marks align with published references.
Reports emphasize evidence and uncertainty. You’ll receive photographed-clue notes (what marks were readable and where), confidence levels tied to mark clarity, and suggested interpretations such as probable era or assay office. The tool flags when marks are ambiguous and lists the follow-up checks that would reduce uncertainty.
Practical extras include condition notes, surface observations relevant to identification (for example, whether seams suggest later repair), and recommended next steps such as magnified imaging, non-destructive testing, or specialist inspection. For deeper reading on mark types and stamps, see Antique Silver Marks: Hallmarks, Sterling Stamps, and Plate Clues and Silver Hallmarks Identification by Photo: Sterling, Plate, Coin Silver, and Maker Marks for reference examples.
- Item type and visible placement of hallmarks (e.g., inside band, underbase of fork).
- Probable silver standard with evidence citations (numeric marks or assay punches).
- Candidate maker marks and matching references with a confidence score.
- Condition notes and prioritized next checks to reduce misidentification risk.
Items commonly confused with silver hallmarks
Electroplated silver (EPNS) and silver plate often mimic sterling visually but rarely carry full assay punches. Look for exposed base metal at worn edges, seams where plating ends, and shallow decorative stamps rather than deep assay punches.
German silver or nickel silver contains no actual silver and can be mistaken at a glance. These alloys are often heavier than expected and sometimes magnetic; clear numeric stamps like 800 or 925 and assay symbols are absent on base-metal pieces.
Pewter and white metals are another frequent confusion. Pewter is softer, shows different corrosion (dark dulling rather than silver tarnish), and lacks formal assay marks. Photos that capture edge wear and the back of seams will usually reveal the true base metal.
- Plate vs. sterling: worn edges showing copper or brass beneath the surface suggest plating.
- Nickel/German silver: no assay punch and different tarnish behavior; magnet test can help.
- Pewter and white metal: soft surface, dull corrosion, and absence of hallmark punches.
Frequently asked questions
Can you determine silver purity from a photo?
A photo can reveal purity stamps such as 925 or 800 and assay-office symbols, which are strong indicators of intended silver standard. However, a visible stamp alone does not prove actual metal content; non-destructive lab tests (XRF) or chemical assays are the only reliable ways to confirm purity when certainty matters.
What should I do if hallmarks are worn or illegible?
Photograph the area with strong, angled lighting and a macro lens or smartphone close-up mode to enhance shallow punches. Do not aggressively polish or file the marks. If photographs remain unclear, a conservator or assay office can often read faint punches with magnification and lighting; the identification tool will note unreadable marks and lower confidence.
How can I tell a genuine maker’s mark from a later re-engraving?
Factory maker’s punches are usually uniform in depth, spacing, and placement and sit cleanly within a punched surround. Later re-engraving is often shallower, shows tool chatter or irregular letter shapes, and may cut across other marks. High-resolution photos of the mark edge and surrounding metal help the report flag probable rework versus original stamping.
Do pocket watch cases follow the same hallmark rules as jewelry?
Pocket watch cases have their own conventions: many British cases carry control marks, assay punches, and date letters on inner cuvettes or dust covers rather than external surfaces. U.S. watch cases may show manufacturer case marks separate from movement serials. A photo of the inside cover and hinge area is especially useful when identifying watch-specific hallmarks.
Related guides
Try a photo ID on your hallmark
After you’ve checked visible clues, use the Antique Identifier app on your phone to take close, well-lit photos of hallmarks and joins. The app provides a first-pass identification report that highlights readable marks, lists likely maker or assay matches, and recommends the next checks to confirm metal and provenance—without claiming final authentication.