

Old Bottle Markings: Seams, Bases, Logos, and Date Clues
Read old bottle markings through seams, bases and embossed logos. Learn which clues support identification and why photos alone cannot prove age or provenance.
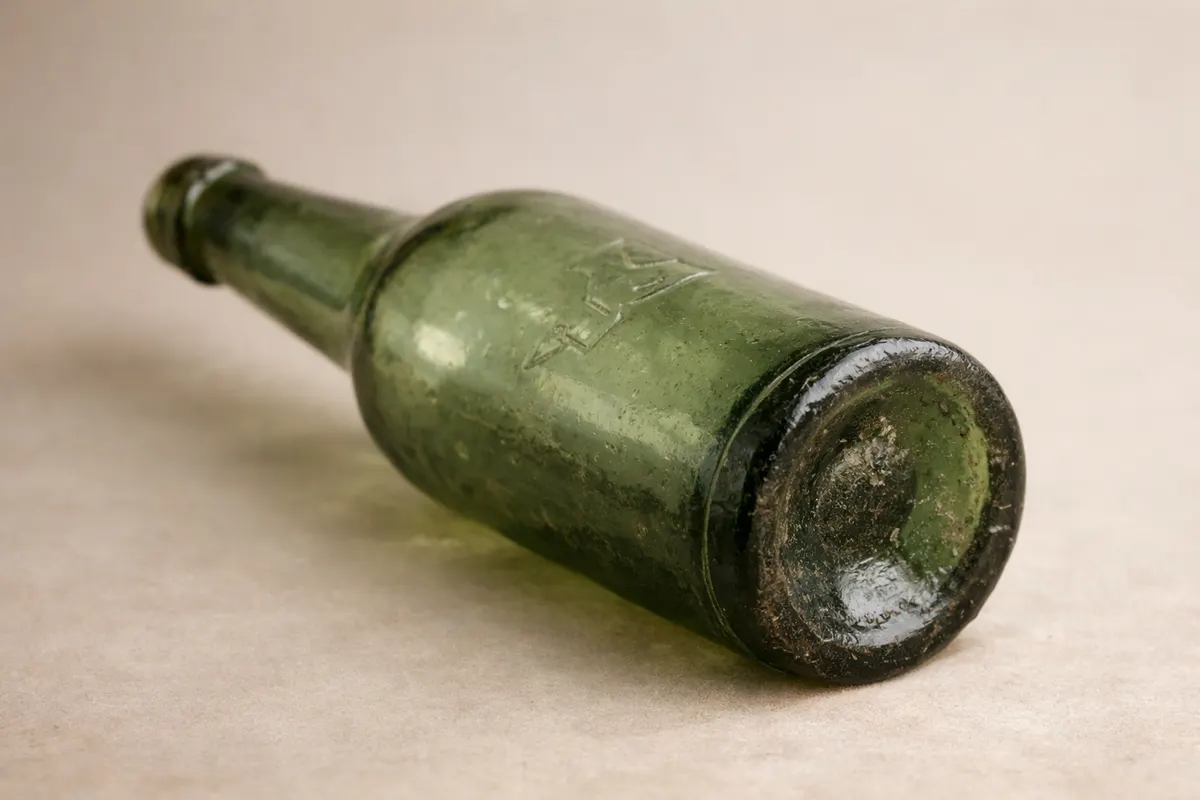
Quick answer: what photos can tell you about old bottle markings
Photos give several reliable clues about an old bottle’s manufacture and likely era, but they rarely prove a full provenance on their own. The most dependable visual signals are how a bottle was made (hand-blown, applied-top, or machine-made), base features like pontil scars or ground bases, and clear embossed marks or molded logos. Taken together these clues narrow possibilities from ‘unknown’ to a short list of plausible dates and makers.
A single clear photo of the base and shoulder can confirm features that survive time and lighting: whether seam lines cross the lip (indicating machine manufacture), a pontil scar (hand-blown), or a distinct embossed maker’s name. A label or paper tag can be helpful, but labels are fragile and removable—treat them as supporting evidence, not proof.
Use photos first to build a documented chain: manufacturing method + base treatment + any legible logo or embossing + consistent wear patterns. That chain is the working hypothesis; if multiple clues point the same way, confidence rises. If clues contradict, note which ones are stronger (construction and base are usually stronger than color or a vague logo).
- Most useful photo angles: base (flat on surface), shoulder and neck (to show seams and applied lips), and a full-profile shot for shape and color context.
- Top visual priorities: seam termination, pontil marks, ground or polished bases, applied versus tooled lips, and crisp embossed lettering or logos.
- Treat labels, stickers, and provenance claims from sellers as supporting evidence—document them, but do not accept them alone.
- A distinctive mark may narrow the research, but no isolated clue proves an exact date, authenticity or provenance.
Old bottle markings examples to inspect in photos
Start with features that are least affected by lighting and image quality. Mold seams, base finishes, and embossed marks survive well and are visible in ordinary phone photos. For example, an obvious pontil scar—rough, circular, and often with a cold chip on the base—can indicate the use of a pontil during finishing. Pontils were also used with mold-blown bottles, and similar marks occur on later handmade glass; a scar is not a date by itself.
Seams are one of the clearest manufacturing clues. If seam lines run uninterrupted over the lip and finish, the bottle is likely machine-made (post-1900 for many bottle types). Seams ending below a hand-finished lip can support a mouth-blown interpretation, but the height of a seam is not a simple dating scale. Manufacturing practices overlap, and worn or obscured seams need caution.
Base details matter. A ground or polished base (smooth, flat, sometimes with concentric lapping marks) often means the bottle was finished to sit evenly and may indicate higher-end tableware or later finishing processes. A pontil scar or tooled rough base tells a different manufacturing story. Also watch for embossed maker names, initials, or numbers that are legible and well-formed—these can often be matched directly to manufacturer records or reference images.
For the manufacturing distinctions and their exceptions, use the Society for Historical Archaeology’s Historic Glass Bottle Identification & Information Website: https://www.sha.org/bottle/. Compare the complete diagnostic sequence rather than turning one seam or base mark into a calendar date.
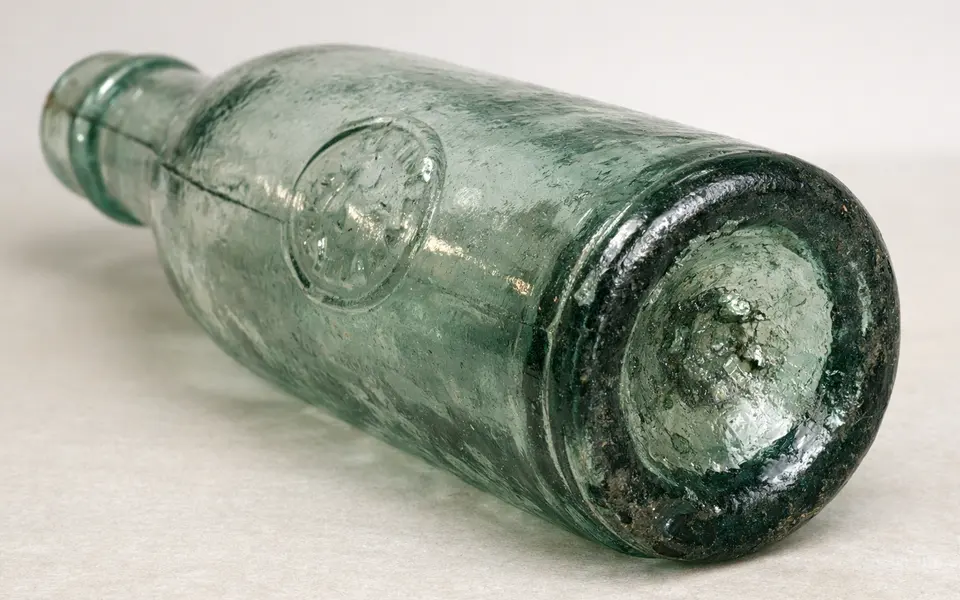
- Pontil scar: rough, irregular circular mark on the base — strong sign of hand-blown manufacture.
- Mold seams: continuation onto the finish can support machine manufacture; inspect the whole finish and base before assigning a method.
- Ground/polished base: document where material was removed; polishing alone does not establish age.
- Embossed logos or numbers: photograph close and flush to the mark for legibility; high-contrast light across the embossing helps.
- Applied lip vs tooled lip: applied lips are added afterward and visible as a ring; tooled lips were shaped while hot and fit more fluidly to the neck.
Weak signals to avoid over-interpreting for old bottle markings
Color alone is a shaky clue. Glass color can suggest a period (for example, certain aqua greens are common in 19th-century bottles), but color is affected by recycling, later treatments, and even photographic white balance. Rely on color as a supporting detail, not a primary identifier.
Surface wear and residue can mislead. Heavy scuffs or stains might suggest age, but some collectors artificially distress bottles to look older, and bottles recovered from certain environments (like docks or trash pits) acquire specific patinas not tied to manufacturing date. Look for consistent wear in predictable places—heel, lip edge, and base contact points—rather than random abrasions.
Photograph angle traps: glare, backlighting, or low-resolution cropping can hide or distort seams and embossing. A seam line that looks continuous in a glare-heavy photo may in fact stop under the finish when seen up close. Always request (or make) a shot with raking light across the seam and one that isolates the base.
- Do not treat label fonts or marketing language on a label as proof of age—labels are often replaced or faked.
- Avoid conclusions from single poor-quality photos—ask for a clean, in-focus base and shoulder image.
- Beware of generic ‘looks old’ judgments from online sellers; ask for detail shots around seams and bases.
- Color descriptions should be supported by physical clues like seam termination and base type.
How to compare likely matches using multiple old bottle markings clues
Treat identification as a workflow: gather, verify, compare, then document. Start by photographing the key areas (base, shoulder/neck, full profile, and any embossing) and organizing the images so you can compare them to reference examples. When you compare, line up manufacturing clues first (seams and base), then style and ornament, and finally makers’ marks.
Example workflow with a hypothetical green apothecary bottle: 1) Base photo shows a rough pontil—tentatively tag as hand-blown. 2) Seams stop at the shoulder—supports mouth-blown mold with hand finish. 3) Embossing reads ‘DR. SMITH’S’—search period ads and bottle catalogs for that embossing. If multiple sources match the combination (pontil + shoulder seam stop + matched embossing), confidence rises strongly.
When two candidate identifications fit a single photo, look for discriminators. Makers’ mold codes, exact letterforms of embossing, and subtle finish treatments (ground base vs. polished pontil) are high-value discriminators. Low-value differences—color shade and minor surface scratches—should not be used to pick between close matches.
Keep a record of your comparison sources. Note where you found each match (catalog, published reference, museum photo, seller listing) and why you prefer one match over another. This documented chain is useful if you later consult experts or tools because it shows how you reached your conclusion and which clues remain uncertain.
- Step 1 — Gather: base, shoulder/neck, full profile, and any embossing in separate photos.
- Step 2 — Verify: check seams under raking light, inspect the base for pontil or polishing marks.
- Step 3 — Compare: match construction clues first, then ornament and maker marks.
- Step 4 — Document: list reference sources and note which clues are decisive and which are ambiguous.
Using Antique Identifier after you check visible old bottle markings
Once you’ve built the documented chain of clues—manufacture method, base treatment, and any legible marks—use Antique Identifier as one optional next step for quick comparisons and broader example searches. A photo-based suggestion can help narrow research questions, but treat its suggestions as research leads rather than final verdicts.
When you consult the tool, start with the clearest photos you took: a clean base close-up, a shoulder/neck detail for seams and finish, and a full-profile shot. Clear, well-lit images make automated matches more useful and reduce false positives from glare or crop artifacts. If you’ve documented embossing letterforms, include that text in the tool’s search when the interface allows.
Antique Identifier pairs well with deeper reference checks. If the app surfaces a likely maker or time range, follow up by comparing the suggested matches to reference material such as the Antique Glassware Identification guide (https://antiqueidentifierbypicture.app/identify/antique-glassware-identification) or item examples like Antique Glass Vase Identification (https://antiqueidentifierbypicture.app/examples/antique-glassware-identification/antique-glass-vase-identification). Use the app results to prioritize which printed or online references to consult next.
Remember the app’s suggestions are part of the evidence chain. If the app recommends a maker but the seam pattern or base type contradicts that maker’s typical production, treat the app result as a lower-confidence lead and seek additional confirmation—historic catalogs, maker mark registries, or a specialist’s opinion.
- Upload your clearest, well-lit photos and prioritize base and seam detail shots for the best matches.
- Treat suggested identities as leads; independently compare letterforms, construction and base details with documented reference specimens.
- Follow up app suggestions with specialist references and documented museum or archaeological examples.
- Do not accept an app match alone; corroborate with construction clues and recorded examples.
Related guides
Next step: use Antique Identifier as a research aid
After you’ve photographed seams, the base, and any embossing, try Antique Identifier for quick image comparisons and example matches. Treat the app’s results as research leads: compare suggested matches to your documented clues and to specialist bottle references and documented examples. If the app narrows possibilities, use that focus to request clearer photos or consult specialist references before drawing final conclusions. Visit https://antiqueidentifierbypicture.app/tools/antique-glass-identification to explore identification tools and example cases.
Take the next step →Frequently asked questions
Old bottle markings meanings: What can they reliably show when I only have one photo?
A clear photograph can document visible seams, base texture and embossed lettering, but assigning a manufacturing method may require other views. A pontil scar does not by itself date a bottle, and seam height is not a reliable calendar scale. Build a tentative interpretation from several features, then compare it with documented references.
How do I document old bottle markings examples I find online so they help identification?
Save the full source for every comparison: a screenshot, the URL, and a short note of which physical clues matched (for example, ‘pontil + shoulder seam stop + DR. SMITH embossing’). Don’t rely on thumbnails; copy the exact letterforms by hand and note any differences in spacing or serifs. Organize matches by confidence—high (multiple matching physical clues), medium (one strong match plus supporting details), low (superficial style match). This documented approach makes it easier to return to sources and to present your finds if you ask a specialist for help.
What are clear examples of maker logos or embossed marks that are useful in bottle identification?
Useful maker marks are crisp, legible embossings such as full names, initials with known manufacturer associations, or registered numbers. For instance, a well-formed manufacturer initial inside an oval or diamond can point to a specific glassworks when matched to a registry. Numbers often indicate mold or style rather than a maker, but if paired with maker initials they become far more useful. Photograph marks at a slight angle with low, raking light to make shallow embossing readable.
If seams look inconsistent in photos, how should I proceed with identification?
Use raking light and several views of the shoulder, neck, finish and base. Wear, polishing, unusual manufacturing methods and lighting can all make seams hard to interpret. Do not substitute a ground base as automatic proof of age. Record the uncertainty and consult a specialist reference or examiner before choosing a date.