

Antique Table Styles: Legs, Tops, Joinery, and Era Clues
Learn which antique table styles details a photo can prove, which it cannot, and the follow-up checks worth doing before you rely on the answer.
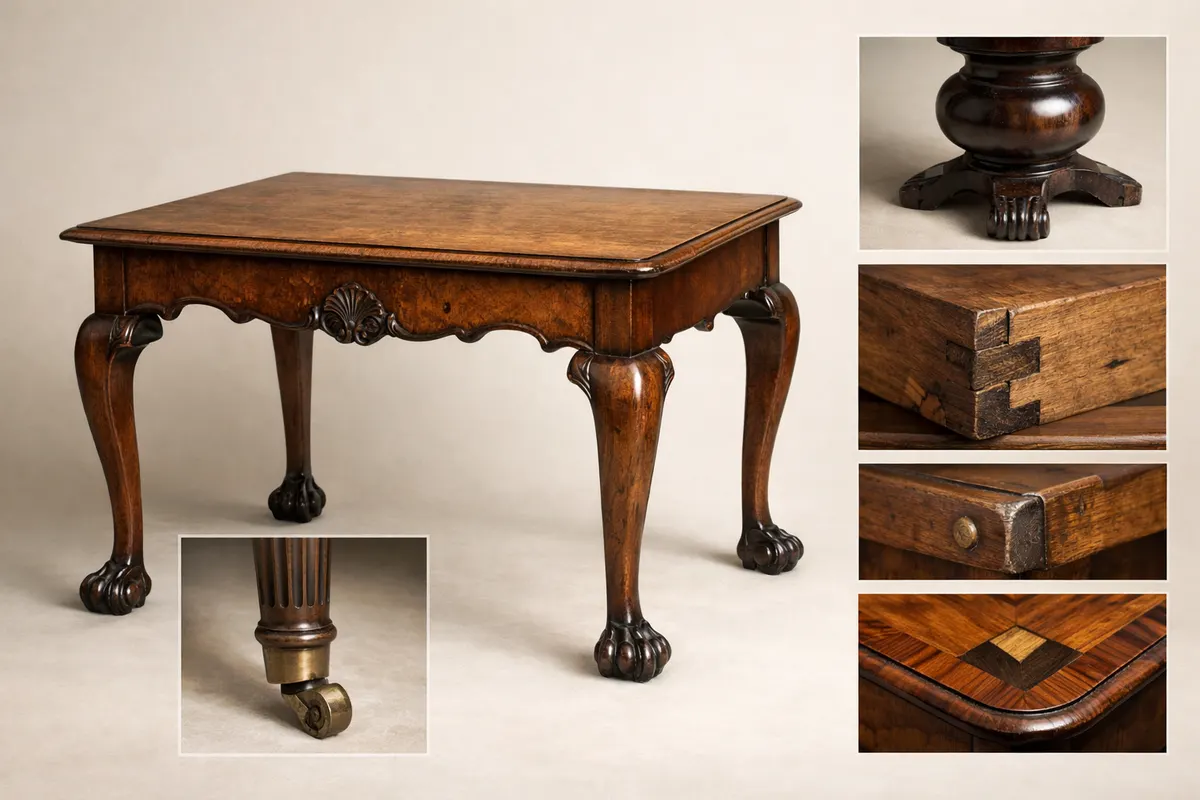
Quick answer for antique table styles you can see in photos
Antique table styles can often be narrowed to a small group from a good photograph, but a single photo rarely proves a precise origin or date. Key visual cues—leg shape, top edge profile, visible joinery, and hardware—are the strongest signals you can reliably read from images. Together these clues frequently point to a style family (for example Queen Anne, Federal, or Victorian) rather than an exact maker or year.
When you look at a photo with the goal of identifying antique table styles, focus first on structure and joinery. Legs and how they attach to aprons survive low resolution and poor lighting better than surface color or finish. A turned cabriole leg with a pad foot, for instance, is a strong signal toward 18th-century English or American Queen Anne–inspired pieces, while thin, tapered, reeded legs more often indicate late 18th- to early 19th-century neoclassical influences.
Use context to narrow possibilities: room setting, scale, and paired furniture items (like matched chairs) help. If you need to go beyond a likely style family, collect multiple clear photos—top-down, leg detail, apron and underside, and any hardware or stamp—then treat any digital identification as a research lead, not a final appraisal.
- Strongest photo clues: leg form, top edge profile, visible joinery, hardware type.
- What photos usually cannot prove: exact maker, precise year, or market value.
- If you want precision, gather multiple photos: top, underside/joinery, legs, and hardware.
- Treat an image-based ID as a starting point for further research or professional verification.
Strongest visual clues for identifying antique table styles
Leg design is one of the most robust clues for antique table styles because leg shapes are structural and less affected by surface repairs or refinishing. Look for characteristic leg types: cabriole legs with scroll or pad feet (seen on Queen Anne and Chippendale pieces), turned legs (common on Jacobean and certain 17th–18th-century provincial tables), tapered and reeded legs with spade or saber feet (Federal and Sheraton), and slender, squared legs with stretchers (Arts & Crafts and some Victorian types). Photograph each leg from top to foot to capture proportions and ornament.
Joinery visible from the underside or apron edge is another strong indicator. Machine-cut dovetails, long-sawn pegs, mortise-and-tenon joints, and evidence of hand-planed irregularities can separate early handcrafted furniture from later factory-made work. For example, large, irregular hand-cut dovetails and pegged tenons usually suggest pre-1860 construction, while tiny, uniform machine-cut dovetails point to later 19th-century production.
Top edge and apron profiles survive cleaning and refinishing better than surface color. A molded top edge with multiple beads and ogees often signals Georgian influence; a simple chamfered or eased edge aligns with folk, country, or Arts & Crafts pieces. Drop-leaf hinges, butterfly-shaped brackets, and visible top fastening methods (screw types, sliding clips) are useful when visible in clear photos.
Hardware style and attachment pattern are reliable when original. Cast brass lion-mask pulls versus simple turned wooden knobs versus stamped tin hinges indicate different eras and production methods. Show clear close-ups of screws: early slotted iron screws have uneven slots and tapered shanks; later machine screws are uniform. Hardware can be replaced, so always weigh it against joinery and leg form.
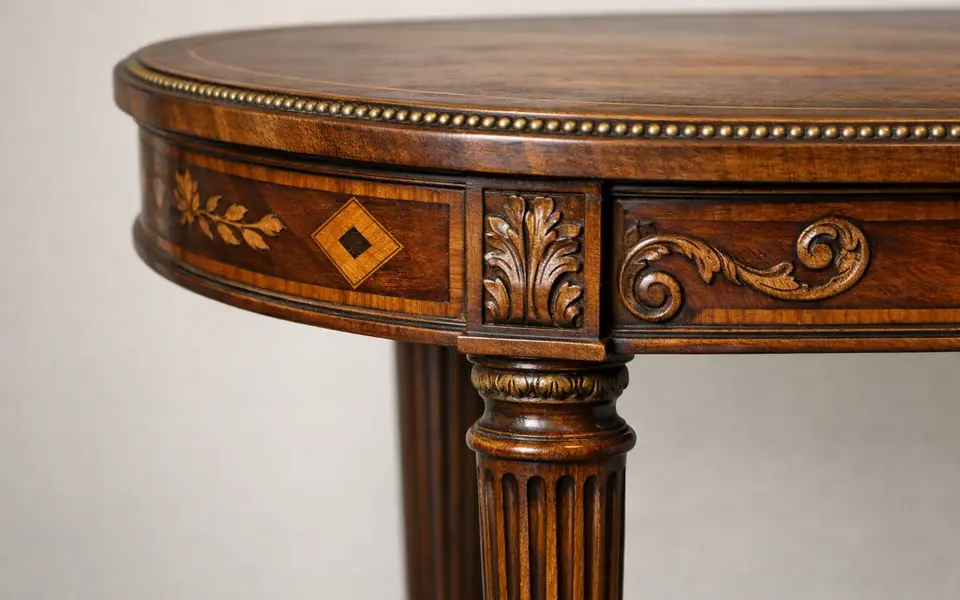
- Leg form and foot type: prime style indicator (cabriole, turned, tapered, square).
- Underside joinery: pegged mortise-and-tenon, hand-cut dovetails vs. machine dovetails.
- Top and apron profile: molded edges, chamfers, or plain slabs show stylistic era.
- Hardware type and fasteners: original iron or brass hardware, screw details.
- Wear patterns and construction marks: tool marks, plane strokes, and assembly layout.
Weak signals: what to distrust in photos of antique tables
Color and finish are among the weakest signals in a single photo. Surface color can be altered by lighting, camera white balance, or later staining and refinishing. For example, a mahogany table that’s been stripped and refinished might look like a different species in photos. Avoid treating patina color as proof of age without corroborating joinery or tool-mark evidence.
One-angle photos create false confidence. A tabletop photographed from one side can hide construction details: you might miss an apron repair, replaced legs, or a modern spline. Glare and reflections obscure carving or inlay; low-resolution photos lose subtle chamfers and tool marks. If you only have one snapshot, use it only to form a tentative hypothesis rather than a definitive style ID.
Small decorative motifs, veneers, and inlay patterns can be copied and reapplied in later reproductions, so they are weak standalone signals. A carved shell motif does not automatically mean a piece is Rococo or early Georgian; that motif might be decorative applique added during a period restoration. Always cross-check ornament with structural evidence.
- Finish color and sheen: altered by refinishing, lighting, and camera settings.
- Single-angle photos: easily hide replacements, repairs, and joinery.
- Veneer patterns and small motifs: commonly copied or restored on later pieces.
- Scale and context: a tabletop alone may look like a different style out of its original setting.
How to compare likely matches for antique table styles
Comparing likely style matches works best when you treat each clue as a data point and eliminate options that contradict multiple observations. Start with three hypotheses based on the clearest visible clue—often the legs—and then test each hypothesis against joinery, top profile, and hardware. For instance, if legs suggest Queen Anne, but joinery shows machine-made dovetails and stamped hardware, that combination points to a later reproduction rather than an original 18th-century table.
Create a quick evidence matrix for each candidate style: list leg type, joinery type, apron/top profile, hardware, and any maker marks or stamps. Assign each item a simple match score (yes/no/uncertain). A genuine candidate will have matches across structural features, not just surface ornament. This systematic approach reduces bias from a single striking detail.
Compare proportions rather than isolated motifs. Queen Anne tables typically have a certain leg-to-top proportion and a prominence of curve in the apron; Sheraton or Hepplewhite pieces show straighter, lighter proportions and more delicate inlay. Use measurements from the photo when possible—table height, skirt depth, leg diameter at its thickest point—and compare those to published examples or museum references.
Use controlled lookalike comparisons to identify common traps. For example, many 19th-century revival tables copy earlier leg shapes; the difference often appears in the joinery and tool marks. Similarly, factory-made tables from the late 19th and early 20th centuries might have turned legs resembling earlier pieces but show consistent lathe patterns and modern fasteners under the apron. When a detail is ambiguous, prioritize structural evidence over decoration.
- Set 2–3 candidate styles from the clearest clue, then test against joinery and hardware.
- Use a simple yes/no/uncertain matrix to compare features across candidates.
- Measure proportions from photos to compare to reference examples.
- Watch for revival or reproduction features: lathe uniformity, machine dovetails, modern screws.
Using the app after you check visible clues
After you gather photos and run the evidence matrix, use an image-based research tool as a next step to surface visually similar items and likely style families. Treat the app’s suggestions as research leads that point to comparable examples, auction records, and reference images rather than definitive identifications. An app can speed up comparison across large image sets, but always re-evaluate matches against your joinery and hardware checklist.
Prepare photos that help the app and your own assessment: a full-top view for proportion and veneer pattern, close-ups of each leg including where it joins the apron, a clear shot of underside joinery and any fasteners, and a hardware close-up. The clearer and more varied the angles, the more useful the app results will be for narrowing antique table styles examples.
Use the app’s similarity results to find authoritative references, such as museum examples or auction catalog entries, then cross-check those references for construction notes or provenance. If the app suggests a style family that fits your evidence matrix, add that family to your research notes and look for confirmatory details—maker marks, stamped hardware, or documented construction features—that would support a confident ID.
When results remain uncertain, document the ambiguous points and treat the app output as a research record. If you plan to sell, insure, or appraise the piece, follow up with an in-person inspection by a qualified antiques professional. The app is a practical research tool for narrowing possibilities, but it does not replace hands-on verification when provenance or market value matters.
- Use the app to surface visually similar examples and auction references.
- Upload or scan only the photos you prepared: full top, legs, underside, hardware.
- Cross-check app matches against joinery, tool marks, and fastener types.
- Keep app results as leads; seek in-person verification for provenance or value questions.
Related guides
Ready to compare your photos to similar tables?
After you check legs, joinery, top profile, and hardware, use Antique Identifier to surface visually similar examples and auction references. Treat the app’s suggestions as research leads: compare those matches against your joinery notes, then pursue in-person verification if provenance or value matters. Start your scan on iOS to collect comparison images and build your evidence log.
Take the next step →Frequently asked questions
Which table features are easiest to identify from a phone photo?
Phone photos reliably show leg shape, top profile, and visible hardware when taken close and clear. Legs and how they join the apron are structural and tend to survive refinishing, making them dependable style clues. Close-ups of screws or hinge types can also indicate a production era if they aren’t replaced. For the most reliable photo evidence, include an underside shot that exposes dovetailing, tenons, or pegged joints.
Can I tell how old an antique table is from the finish or color?
Not reliably. Finish color can be changed by refinishing, staining, or environmental exposure, and camera settings or lighting can misrepresent original hues. Use finish as a supporting clue only after confirming joinery, tool marks, and construction methods. If finish is critical to your question—such as proving an untouched patina—seek an in-person assessment by a professional conservator or appraiser.
How do I photograph a table to capture joinery and style clues?
Take a sequence of photos: a full top shot (from slightly above to show proportions), a close-up of each leg from attachment to foot, an underside view of one corner showing how the leg meets the apron and any fasteners, clear images of hardware and screw heads, and overall context shots that show scale and paired pieces. Use even natural light when possible, avoid harsh flash that creates glare, and include a small ruler or known-size object in underside shots to help scale measurements.
When should I trust an app’s identification for an antique table?
Trust an app’s identification as a useful starting point when it points to a style family that matches your observed structural clues—leg type, joinery, and apron profile. If the app’s suggestion aligns with multiple independent signals from your matrix, it’s a stronger lead. However, do not treat an app result as definitive proof of age, maker, or market value. For high-stakes decisions—sale, insurance, or legal provenance—follow the app research with a hands-on expert inspection.